RocketChat server not running. Cancelling

As you might know, I’ve set up a RocketChat server recently on Digital Ocean. So far it’s been working great. An update every once and a while is all it needs.

However, yesterday, I attempted an update that failed. From then on every attempted update resulted in “RocketChat server not running. Cancelling”. This was very frutrating.

First, a few commands to try that might help:

  1. systemctl restart rocketchat.service – This will start your RocketChat server in case it is stopped.
  2. systemctl status rocketchat.service – Use this command to check the results of the previous command. Typically this will report that the service is “Active” if the previous command was successful.

In my case, the second command resulted in a “failed” state. The command itself gave me some information as to what the failure was, but not a lot of context as to what caused the failure. However, it did show me the process that it attempted to run. It said, ExecStart=/opt/nvm/versions/node/v14.19.3/bin/node /opt/Rocket.Chat/main.js (code=exited, status=1/FAILURE).

Alright! We’re getting somewhere. With that I was able to figure out what command failed and where that command was run. I navigated directly to the /opt/Rocket.Chat directory which was where the failure was occurring. From here I ran node main.js. The results of this command were much more helpful. They told me this, Error: Cannot find module '@meteorjs/reify/lib/runtime'. That looks like an issue with npm dependencies.

So, I poked around the Rocket.Chat directory structure and looked for dependencies for the Rocket.Chat server. I found what I was looking for in the /opt/Rocket.Chat/programs/server directory.

From this directory I ran two commands

  1. npm install
  2. npm ci

Afterwards I attempted to start the RocketChat server again using the systemctl restart rocketchat.service command. I checked it with systemctl status rocketchat.service and found that it was working now! RocketChat was back to running normally. The problem with “RocketChat server not running. Cancelling” was gone!
Getting Started with Rocket Chat Using Digital Ocean Backing

RocketChat (https://rocket.chat) is a chatting tool similar to MatterMost and Slack. It offers a self-managed community edition as well as some paid plans and is in active development. I’m just learning how to use it, so I’m planning on documenting my journey here.

I installed and set up RocketChat installed in a matter of minutes. The QuickStart guide, though short, includes most of what you need to get up and running.

To get started with your RocketChat instance on DigitalOcean you need to:

  1. Create a DigitalOcean account
  2. Install RocketChat
  3. Create an A Record that points to your Digital Ocean Droplet. *
  4. Setup your Let’s Encrypt certificate.
    rocketchatctl configure --lets-encrypt --root-url=YOUR_DOMAIN --letsencrypt-email=YOUR_EMAIL
  5. Update your RocketChat installation. Run the following commands from your droplet command line interface.
    1. Run sudo rocketchatctl upgrade-rocketchatctl
    2. Run sudo rocketchatctl update

* I use Cloudflare to host my DNS. In this case I had to disable the proxying on the A Record in order to allow RocketChat to work correctly.

Now visit your site (you should not run into any problems) and create your administration account.

One Note

From time to time the Rocket Chat server responds with “Bad Gateway”. I’m not sure exactly why. However, a DigitalOcean droplet can be restarted by using the reboot command from the command line interface.

Google Fi Auto Connect Issues

Ok, so I use Google Fi (formerly known as Project Fi) as my phone provider. I have a Pixel 2 and haven’t felt the need to upgrade. Recently I’ve noticed issues with my service. Specifically, my Pixel 2 will connect to an H+ network or an Edge network in an area I know has reliable 4G LTE. So, what gives?

First a quick and dirty explanation of the Google Fi network based on my limited understanding šŸ˜. Google Fi utilizes the TMobile (which I believe includes Sprint now) and US Cellular networks as well as WI-Fi to provide cellular service to their customers. Phones on the Google Fi network smartly switch to whatever provider has the best signal. At least that’s the idea.

Knowing that Fi uses multiple cell networks to provide service I wondered what network my phone was using. Using SignalCheck Lite I was able to determine that my phone was connecting to the TMobile network by default. In my area US Cellular beats TMobile coverage hands down. There is no competition. So what is the deal with my phone auto connecting to Edge and H+ networks?

Honestly, I don’t know yet. I strongly suspect a recent update to the Google Fi app or services set my phone to prefer TMobile regardless of network speed. Whether this was an intentional change or a bug in the auto-connect code, I don’t know. I’ve been able to temporarily fix this issue by forcing a connection to US Cellular using Google Fi dialer code: *#*#34872#*#*

Google Fi Dialer Codes

I pulled these codes come from this post on ArkieNet. I’m including them here just in case the post poofs from the internet in the future.

Note this paragraph from the original article:

The following options are only available for ā€œDesigned for Fiā€ phones. They will not work on the iPhone or ā€œCompatible with Fiā€ phones because they are T-Mobile only.  See which class of phone you have here.

ArkieNet
ALPHA CODEDIALER CODEDESCRIPTION
FI AUTO*#*#342886#*#*Set carrier selection to automatic.
FI NEXT*#*#346398#*#*Select Next Carrier
FI SPR*#*#34777#*#*Select Sprint for 2 hours
FI TMO*#*#34866#*#*Select T-Mobile 2 hours
FI USC*#*#34872#*#*Select US Cellular 2 hours
FI SIMON*#*#3474666#*#*Select Three (UK only)
ALPHA CODE
DIALER CODE
DESCRIPTION
FIXME*#*#34963#*#*Force reactivation
FI INFO*#*#344636#*#*Get information about the current network.
INFO*#*#4636#*#*Get general phone information.
DEBUG*#*#33284#*#*Phone Debug Options
PRL*#*#775#*#*Force download of Preferred Roaming List (Sprint)
PRL*228Force download of Preferred Roaming List (US Cellular)
FI ROAM*#*#347626#*#*Turn on International Roaming
SWITCH
SIM
*#*#794824746#*#*Switch to / from eSim.

Issue with Mouse Auto Scrolling on Windows 10

Problem. I installed Adobe Premiere Pro and then all of a sudden my mouse starting automatically scrolling. This happened only in certain places. Like when opening the run command dialog, or when hovering over the Premiere Pro timeline. It did not happen in the browser unless I hovered over a section that had a custom scroll type listener.

The issue with auto scrolling was very frustrating. I was able to figure it out though. Here are the steps.

  1. Right click on This PC in the file explorer menu. Select Manage.
  2. Find and click the Device Manager
  3. Expand the Mice and other pointing devices option
  4. Right click the HID-compliant mouse entry and select Uninstall device.
  5. Your mouse will stop working…
  6. Unplug your mouse from the back of your computer, wait 10 seconds, plug it back in.
  7. Windows should redetect your mouse and the problem should go away.

Alternatively you could try to “Update driver” instead of Uninstalling the device. I didn’t try, my problem was solved with the steps documented above.

Turn off Google Chromes “Switch To Tab” Feature

When I’m browsing, I tend to use tabs a lot. I clean up my tabs when I’m done with them, and I open new ones when I want new ones.

Recently, Google Chrome, introduced a feature which attempts to fix issues of tab proliferation by offering a “Switch to Tab” feature. This feature shows up in the Omnibar when you start typing something in the Omnibar that is similar to a tab you already have open.

It’s an interesting idea, but not useful to me. I find that it negatively impacts my experience using Chrome. Things that use to work (example, right arrow copies selected tab url into current url bar) don’t work with Google Chrome’s new “Switch to Tab Feature”.

I like to think I’m knowledgeable and responsible enough to switch tabs when I want to switch tabs, and open new tabs when I want to open new tabs. That said, I’ll be disabling the “Switch To Tab” feature.

To disable the “Switch to Tab” feature in Google Chrome first find the omnibox-tab-switch-suggestionsĀ flag in the Chrome flags menu. (Psst: it’s here: chrome://flags/#omnibox-tab-switch-suggestions). Then… select “Disabled” from the dropdown options.

Restart Google Chrome and you should be free of that annoying “Switch to Tab” feature šŸ‘šŸ™‚

Disabling Autolaunch of Programs after Shutdown

Last year around this time of year, Microsoft added an Autlolaunch feature to Windows 10. This feature will automatically relaunch certain programs after a Restart or Shutdown of Windows. You’ve likely seen this happen most often with Chrome.

The feature was originally introduced to make Windows Updates feel more seamless, and less invasive. The idea was that, while yes, Windows Updates automatically restart your computer, at least it keeps the windows you had open open! That’s good, right?!

No. That’s not good. That’s annoying. We who restart our computers like to know that they are starting from a fresh state. Those of us who don’t restart our computers like to keep a billion random windows open and probably fill our desktops up with icons. Desktop Icon pointillism art is a thing.

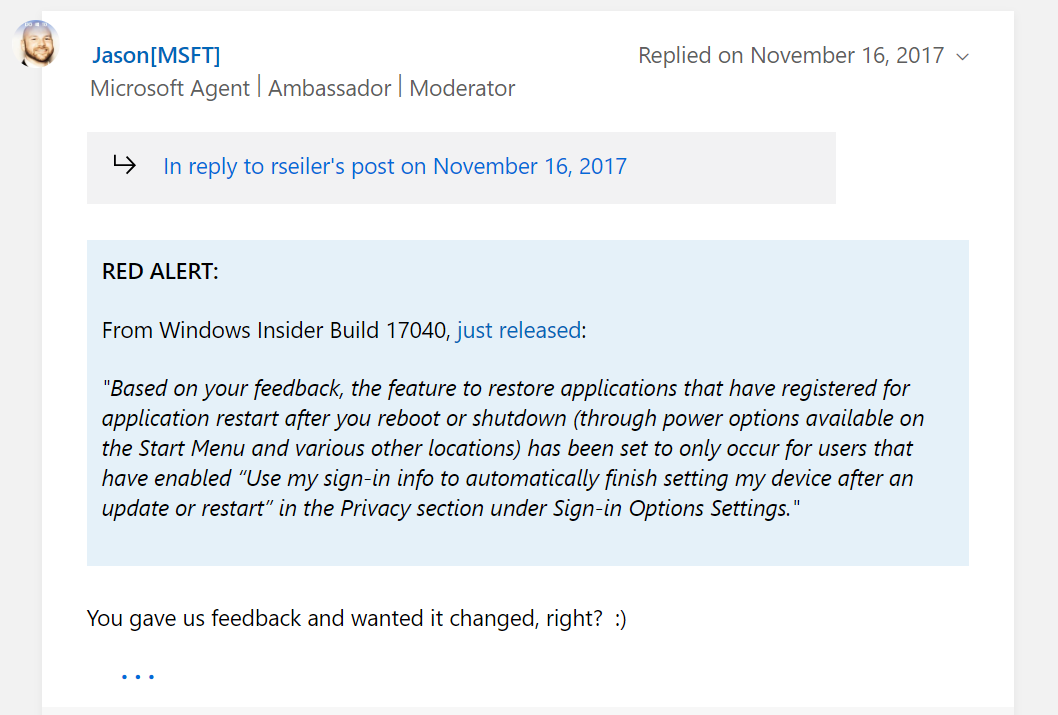
After an extreme amount of backlash from users Microsoft decided to adjust the way the Autolaunch feature worked. This is documented in this thread. You can *disable autolaunch* by disabling the “Use my sign-in info to automatically finish setting my device after an update or restart” setting. You would think Microsoft might make a completely different setting for “Automatically re-launch previously open programs on startup”. But – for now that’s not the case.

Disable Autolaunch
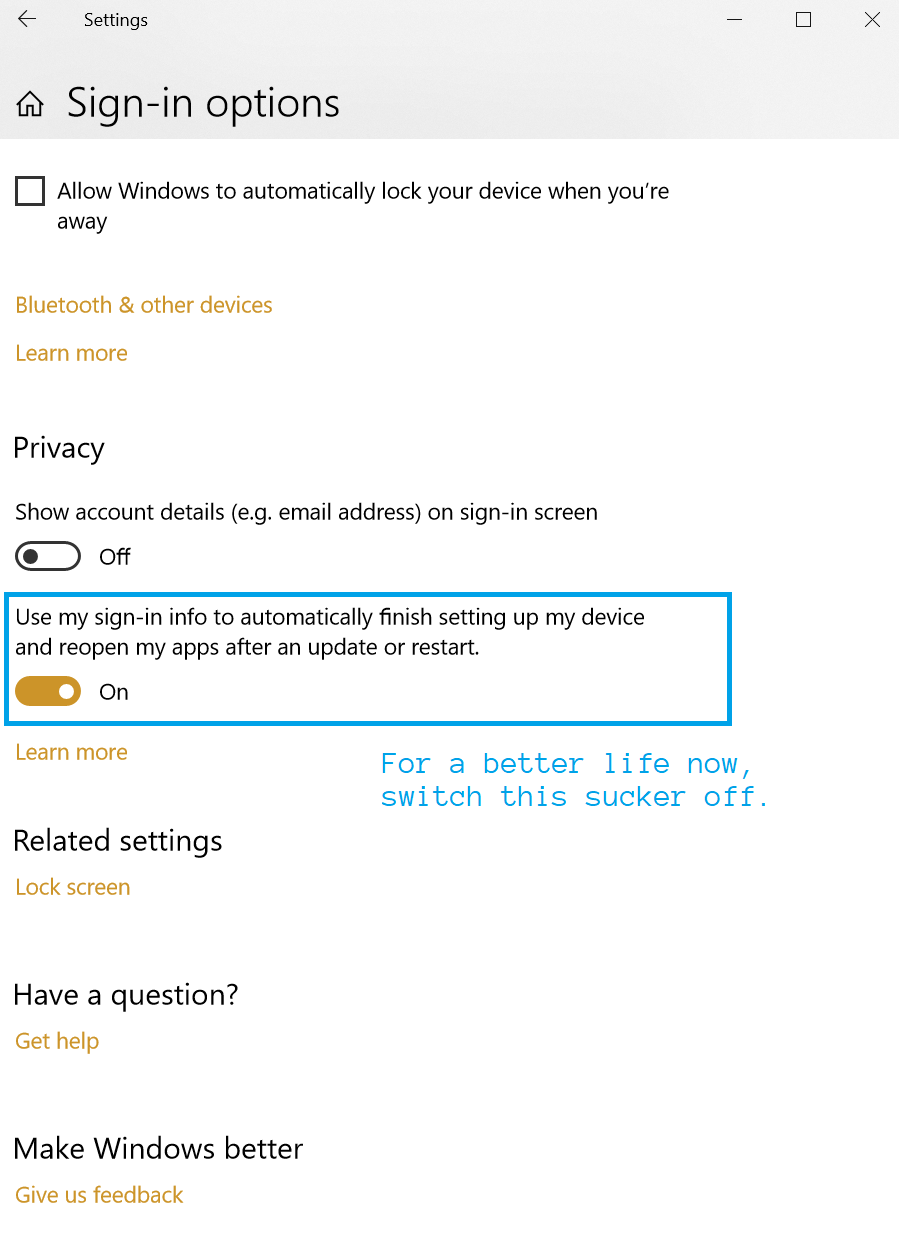
You can *disable autolaunch* by disabling the “Use my sign-in info to automatically finish setting my device after an update or restart” setting.

Above we have the description of how to turn off autolaunch, below we’ve got a picture of where this setting is.

Reopen Apps on Restart

Enjoy not having Chrome automatically start when you reboot your computer šŸ˜Š

Secrets were required, but not provided

Psst… tl:dr -> rebooting my wireless router fixed the problem.

A few months ago I setup a wireless Gitlab server. This server has been working great. Once in a while I check up on it via SSH and make sure it’s updated. Otherwise, I leave it alone and it’s happy.

That is until today.

Secrets were required, but not provided

Today, for some reason, I could not access my gitlab server via the web interface or push to it via the git cli. In fact, I couldn’t even SSH into it. I had to pull out the ol’ physical monitor and keyboard and MANUALLY connect. Shudder.

First thing I do upon connecting to the server is try to ping google.com of course. It didn’t work. The server could not find the address for Google, and as anyone knows, if you cannot find Google then the internet does not exist. Plain and simple. You might as well be trying to fly a kite inĀ the Marianas trench.

Now, up until this point I’ve had no issues connecting to the internet. The server automatically connects to the WIFI no big deal. However, I thought thatĀ maybe the network authorization expired or something? Maybe I can only connect for a few months at a time before re-authenticating. So I tried just that. I whipped out my old friend nmcliĀ and ran:

nmcli device wifi connect MyAccessPoint password 123456789ACB

This is when I see the dreadedĀ Secrets were required, but not provided response. Well – I’m not sure what secrets it wants me to tell it but I mean, the password was right, and I’m certainly not telling it who my favorite little pony is or even if I like little ponies.

I tried several more times, I tried rebooting the server. Nothing worked. It was at that point that I, using another computer, logged into my wireless router and told it to reboot. Several minutes later everything is fine.

Rebooting my router fixed the problem

Why? I don’t know. There has been some talk that some routers will auto select channels that some linux machines do not like.Ā I think that was likely the original issue. Rebooting the router worked because another channel was selected.Ā In any case… long story short. If you are having issues with your wireless server not connecting to your network then try rebooting your router.

Hide the Action Center Icon in Windows 10

It’s the little things in life that annoy me. Things like Microsoft’s Edge browser icon re-appearing on my taskbar. Or, when Windows decides to update just before a meeting.Ā I find these kinds of things to be very annoying. That’s why I was a smidgen irked when the Windows 10 Action Center icon popped up on my taskbar and showed no signs of leaving peacefully.

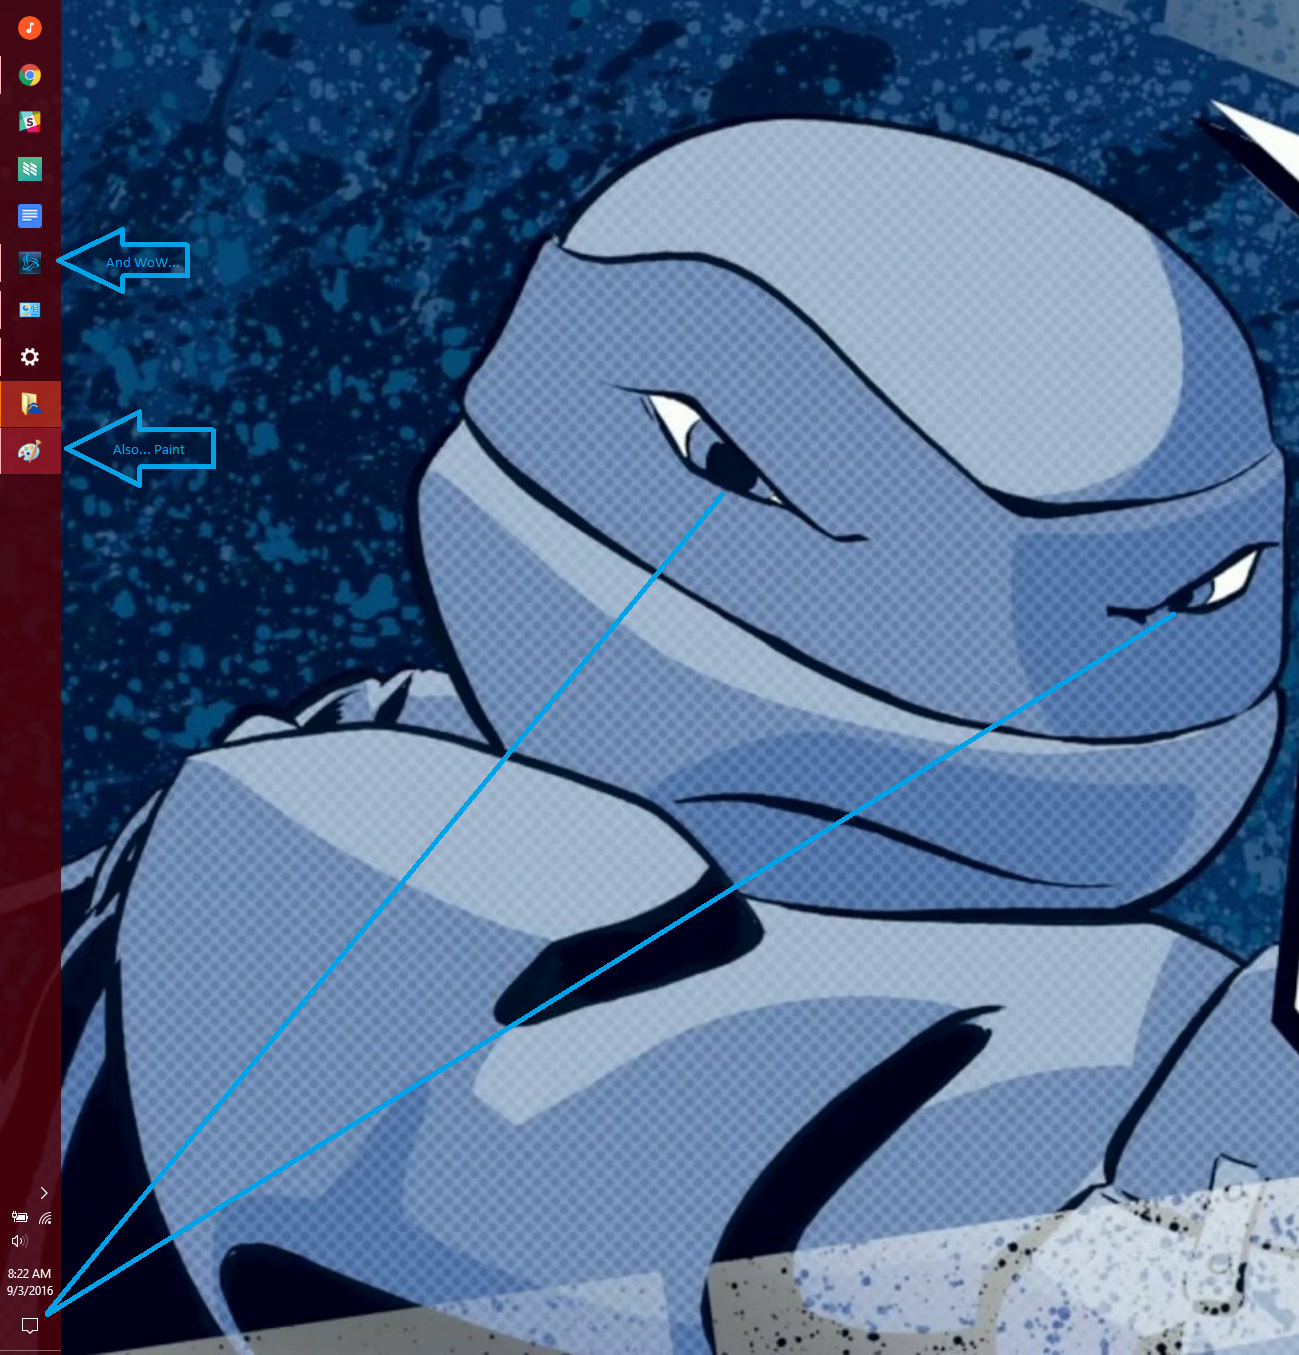
For those of you who do not know what the Action Center Icon in Windows 10 is then allow Leonardo to enlighten you.

Windows 10 Action Center Icon
aRGGG win10 icon, I’ll kill you!

And only now, at the end, do you see your mistake.

Remove the Action Center Icon

Now that we are all aware of the horribleness that is this awful Action Center icon we can set off on our quest to destr… err remove it.

  1. Open the Windows menu
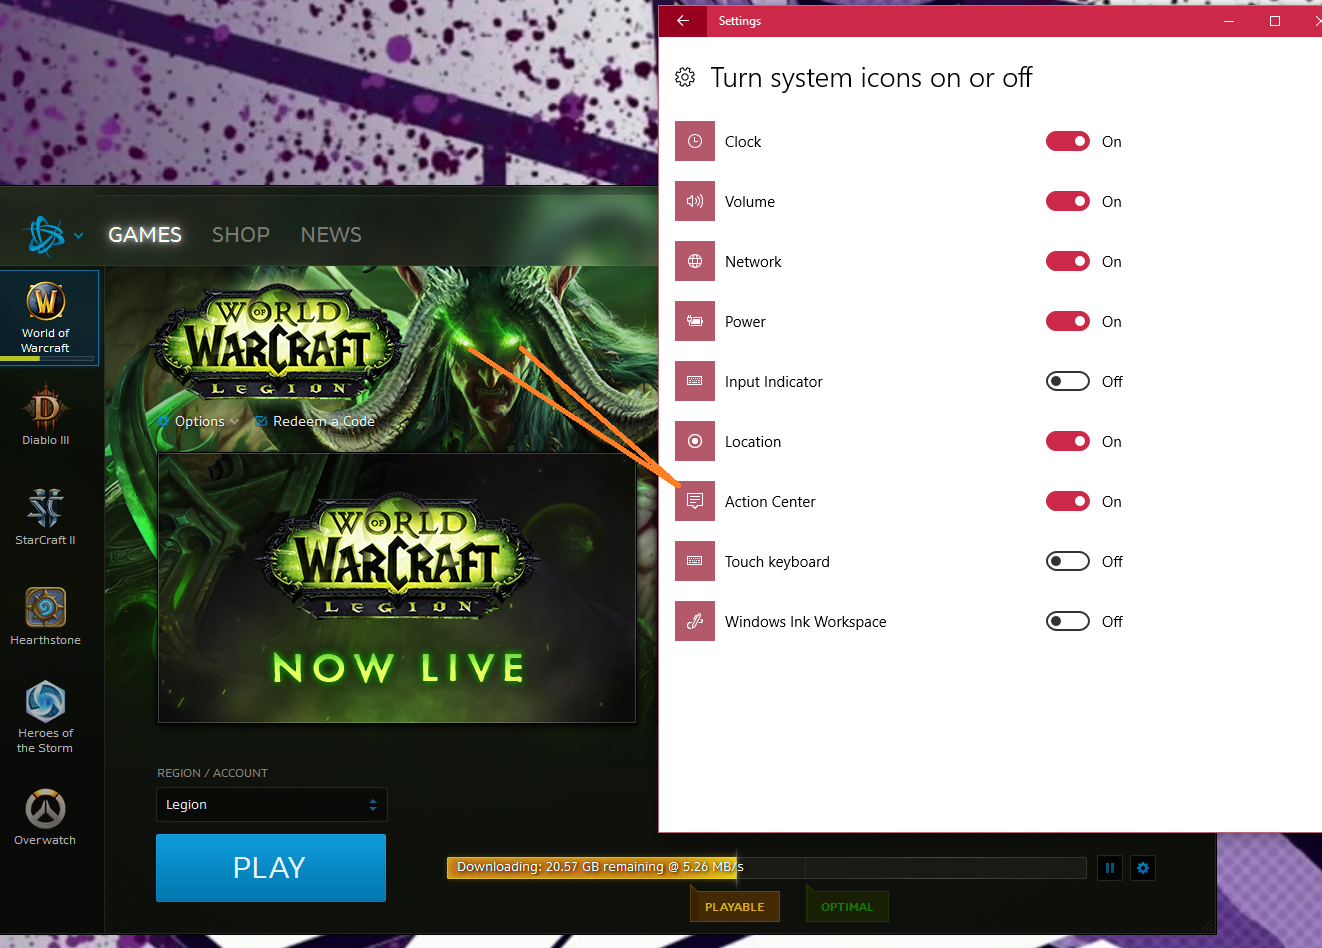
  2. Search for Turn system icons on or off **
  3. Ā Find the Action Center icon.
    1. If you are not sure where the Action Center icon is, let the WoW splash screen show you.

      Turn system icons on or off list
      DESTROY…
  4. Turn if off
  5. Rejoice in the boundless fruits of your labor.

**Alternatively, if you are old school and hate things like convenience, you can navigate to this setting section via the Control Panel. So hop on in your Conestoga Wagon and navigate toĀ Control Panel > Appearance and Personalization > Taskbar and Navigation > Turn system icons on or off.

CIDR Slash Notation and Subnet Masks

I wrote a quick utility to help me figure out the available IP Address range when given a specific IPv4 address and slash number. You know something that looks like this: 192.168.0.0/16. The utility should tell you the range of IP addresses that covers.

I’m not saying I’m a master of CIDR Slash Notation or Subnet masks… but this seems to be providing good results šŸ™‚

Checkout the Calculator

GIT CLI SSH PassPhrase

I use the GIT command line interface a lot. It helps me keep my Git repositories looking sharp and clean. Interactive rebase auto-squashing with posh-git+ConEmu ftw!

However, from time to time I will notice that the GIT cli is asking me for my SSH RSA passphrase more often than I’d like. Sometimes it even asks on every pull. That’s annoying.

It is possible, however, to only enter your passphrase once per session. Setting this up should be as simple as doing the following:

  1. Add the “bin/” folderĀ of your GIT install to your $PATH. This will allow you to reference ssh-agent in your powershell environment.
  2. From your Powershell environment run
    ssh-agent
  3. Now run
    ssh-add

Excellent! That should be it. Now you should be able to push, pull all you want without having to insert your passphrase more than once per session.